
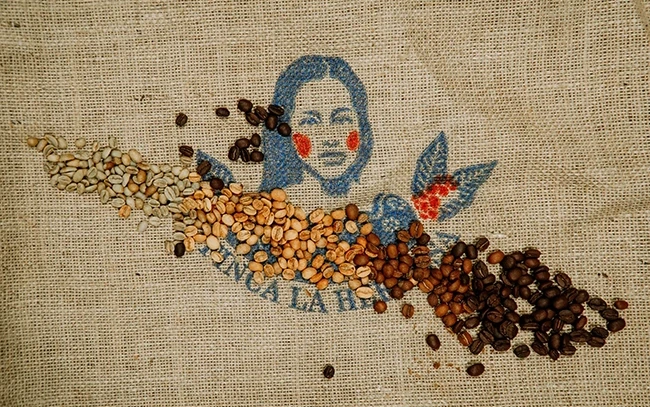
The way in which coffee makes its way from a plantation on the other side of the world and into the cup at your local Starbucks is a series of wonderful and complicated processes. Using products like a home coffee roaster, any people, especially coffee aficionados, are inspired to try and recreate these processes on a small scale in their homes, or at least the processes they can manage. While not everyone has an acre of backyard to devote to growing coffee plants and cultivating fruit, many people do have the kitchen counter space required to experiment with home coffee roasting.
But what is the benefit of doing it yourself? Why would you want to learn how to roast coffee beans at home when you could simply buy a bag of pre-ground Columbian? Well, to start with, it’s a lot of fun. Secondly, learning how to roast coffee beans is an art and a science, and one that can be calibrated in a variety of precise ways to allow you to change and manipulate the flavor profile of the beans exactly to your liking (with enough experimentation and experience). Roasting your own beans at home also means you’re going to be drinking the freshest possible coffee. Since roasted beans tend to lose their flavor and strength over time, being able to roast, grind then immediately brew will give you whole new levels of freshness. And lastly, over a long period of time (once you’ve really dialed in your process), roasting your own beans at home can actually save you money, since raw, unroasted coffee fruit is way cheaper than a bag of dark roasted beans.
If you’ve read this far into the intro then you must be interested in the process. Below, we’re going to examine everything that goes into the coffee bean roasting process, take a look at what equipment you need, and detail exactly what you need to do to start roasting your own beans at home.
What Happens During the Coffee Bean Roasting Process?
There are various different ways to roast coffee at home, but at its most basic, roasting involves taking raw, green, untreated coffee beans and applying them to a heat source for a specified period of time.
Green beans hold a large amount of water in them. If you tried to grind them up and brew them, you would end up with a pasty mix with a distinct grassy flavor profile. Roasting the beans removes the water and starts various chemical reactions which alter the flavor and aroma profile of the bean.
The longer the roast, the higher the temperature, and the more concentrated the heat source are all going to be significant factors in determining how your beans turn out. It’s these factors that you can play with in order to finely tune exactly how you’d like your beans to smell and taste.
There are various stages of roasting. During the first stage, when the green coffee beans are first applied to the heat source, the moisture trapped within them begins to evaporate. This is known as the drying stage or yellowing stage as this is when the beans begin to dry out and turn yellow.
The second stage, also called the browning stage, is when three important chemical reactions start to occur: the Maillard reaction, caramelization, and Strecker degradation. These processes are important as this is where much of the flavor and aroma start to define themselves. This process is finished when you hear the first crack, a term used to describe the sound that occurs when the coffee beans begin to split due to internal pressure caused by the heat.
At this point, if this is how you prefer your beans to be roasted, you could remove the beans from the heat source, but many roasters prefer to continue until they reach the second crack. At this point, the sugars present in the beans break down, the beans become a much darker color, and the acidity is greatly reduced. These dark roasts have a much more bitter flavor profile, as opposed to a more caramelized taste after the first crack.
How to Roast Coffee Beans: Necessary Tools and Equipment
The tools and equipment you need to roast your coffee beans are largely going to depend on the type of roasting method you use. If you’re roasting your beans in a pan, grill, or oven, you will likely already have everything you need to get going.
Otherwise, you will more than likely have to include in a purpose-built home coffee roaster. We wrote about some of the best home coffee roasters in this article, but we’ll list them below just so you have a good idea of what type of roaster to buy:
- FreshRoast SR540
- Nuvo Eco Handy Ceramic Coffee Bean Roaster
- Nesco CR 1010 Professional
- Kaldi Home Coffee Roaster
- MIFXIN Coffee Roasting Machine
- CAFEMASY Stainless Steel Home Coffee Roaster
- Fresh Roast SR800
How to Roast Coffee Beans: A Detailed Look
Source Your Coffee Beans
The very first thing you’re going to have to concern yourself with when learning how to roast coffee beans is finding the right beans. Unlike roasted beans, fresh beans are green and are almost reminiscent of raw pistachio nuts in appearance. When choosing your beans, make sure they’re a good size and uniform color. This will help ensure that you achieve a consistent flavor profile during roasting. There are a number of different merchants that you can source your beans from, but we’ve tried the following and really loved them:
- Primos Coffee Co from Nicaragua
- Anthony’s Whole Bean Green Coffee
- Green Unroasted by Fresh Roasted Coffee LLC
- Morning Hills Coffee Ethiopian Yirgacheffe
Select Your Roasting Method
There are a number of different ways to actually go about roasting your beans, and we’ll examine a few of the most popular below:
Roasting in a pan or grill
Using a pan or grill is often the quickest and most direct way to learn how to roast coffee beans as almost everyone has one at home. While this is convenient and will get the job done, it doesn’t allow you the precise control over the temperature that you need in order to fine-tune your roasts and achieve consistency.
Roasting in an oven
Like a pan, most people have ovens at home, which makes it a great DIY tool when learning how to roast coffee beans at home. A word of caution, however, make sure that your oven has some sort of ventilation as the whole roasting process is an intensely smokey one. If you have a convection oven with a fan, we’d recommend not using turning it on as the chaff from the beans will get absolutely everywhere. Roasting beans with this method is also generally slower than others and makes it difficult to achieve a consistent roast and flavor profile.
Roasting in a purpose-built home coffee roaster
The most effective way of roasting coffee at home is to invest in a purpose-built home roaster. We detailed some of our favorite models earlier in the article, but we’d really recommend the FreshRoast SR540 for beginners who want to experiment with small roasts. The benefit of a purpose-built coffee roaster is that it allows you control over all of the roasting variables such as temperature and duration of the roast. They make it easy to experiment with different methods of roasting, and some even have built-in ventilation systems. The downside is that they can be fairly expensive and take up a bit of counter space.
Prepare Your Roasting Space
One thing that everyone should take into consideration when learning how to roast coffee beans is the smoke. From start to finish, the process is very smokey. If you have an outdoor area that you can dedicate to roasting your beans without fumigating your neighbor’s house, then we highly recommend you use it. If not, make sure that your kitchen is well-ventilated before you even switch on your roaster. Otherwise, you won’t be able to see your hand in front of your face within a few minutes of starting.
Roast Your Coffee
Now that you’ve sourced your beans, selected your roasting method, and prepared your roasting space, it’s time to get down to the actual roasting process. For this tutorial, we’re going to assume you have a purpose-built air or drum coffee roaster, but the same temperature and duration metrics apply to other forms of roasting too.
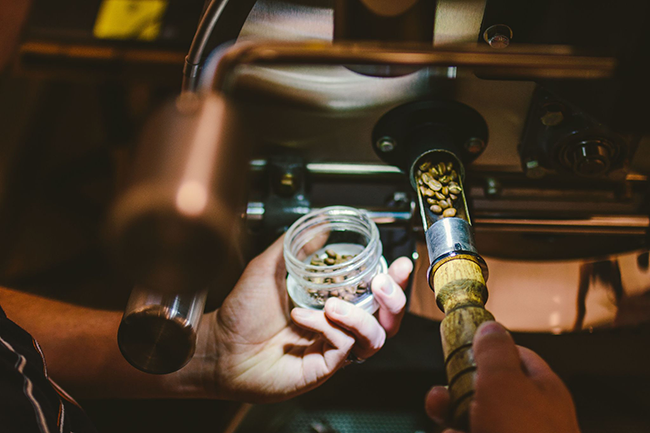
- To get started, warm up your roaster and then add your raw green beans. Many purpose-built roasters have pre-set roasting cycles, so if you’re new to this then we suggest using these for your first few roasts just to get a good feel of it. When you’re ready to manually control the roasting variables, make sure that the temperature is between 170 C to 260 C. Of course this varies depending on the method you’re using.
- Many roasters will have a built-in agitator (in the case of drum roasters it’s the drum itself) to keep the beans moving in order to roast them consistently. Always make sure that your beans are never resting; constant stirring will ensure an even distribution of heat.
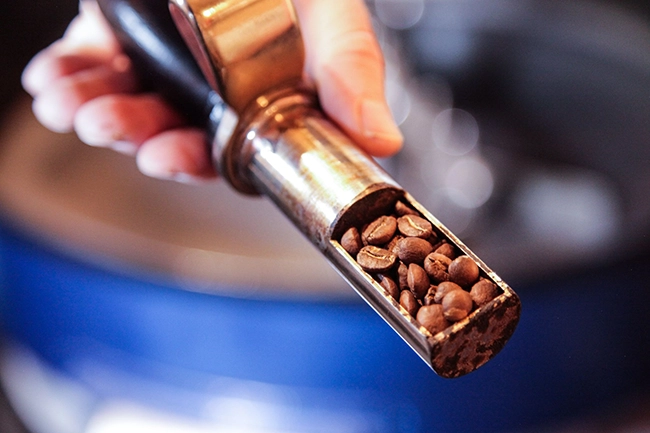
- After your beans have been in the roaster for between 3 and 5 minutes you should hear the first crack. This means that your beans have achieved the first level of roast. If you like light to medium roasts, then this is the time to pull your beans out. If not, continue roasting and agitating them to achieve a darker roast.
- You should hear the next crack – the second crack – when the temperature of the beans reaches 224 C, a few minutes after the first crack. This means your beans are now at a medium roast and should be when you pull them out. If you like dark roasts you can leave them in for longer, but if you’re not careful you risk burning the beans and making them unusable.
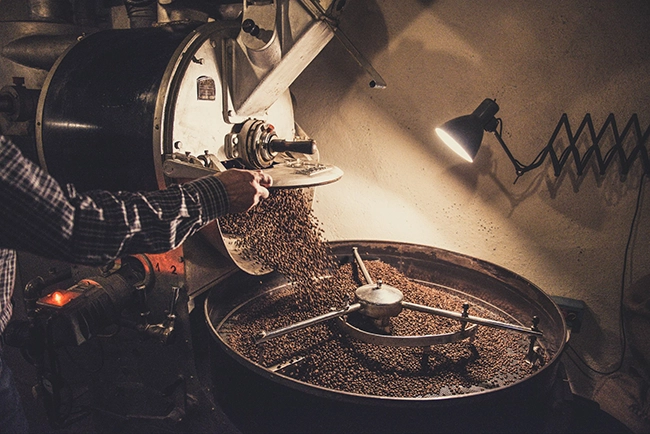
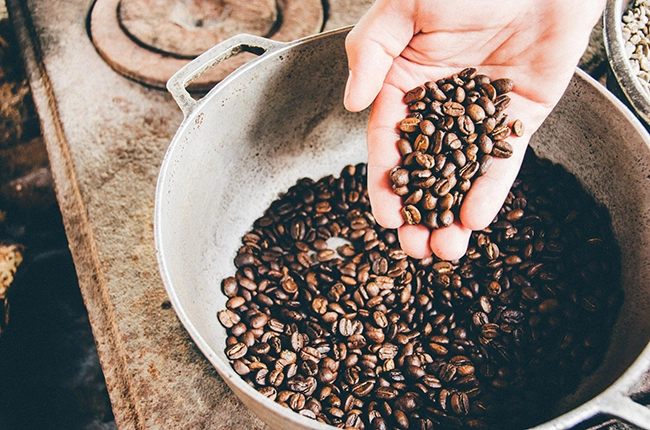
- Once you remove your beans from the roaster, transfer them into a metal baking tray or colander to cool. A good trick is to use two metal colanders and continuously pass the beans from one to the other. This will not only cool the beans quickly but will also remove all of the chaff – the dried outer husk of the bean that you absolutely don’t want in your final product.
Store Your Beans
Once the roasted beans reach room temperature, they can be stored. You want to store your beans in a dark, cool, and airtight environment, as heat, light, and oxidation will spoil your beans quickly. If you have them on hand, foil-lined bags are ideal for keeping your coffee fresh but you can also use an airtight container in a pinch, but just make sure to keep it in a cool, dark corner of your pantry.
Other great storage options are to use either the Veken Coffee Canister or the Fellow Atmos Vacuum Canister, both of which are designed to seal your beans off from potential oxidation.
How to Roast Coffee Beans: Alternative Methods
There are two fairly popular alternative methods of roasting coffee beans that many people like to try at home. The first involves using a hand coffee roaster such as the Nuvo Eco Handy Ceramic Coffee Bean Roaster. This low-tech solution works simply by placing beans into the roaster and holding it over an open flame, being sure to agitate the beans the entire time. Like other roasting methods, you can judge when the beans are ready by listening for the first and second cracks. It’s a great solution if you’d like to roast outdoors or while camping.
The other method involves using a popcorn maker, something like the MIFXIN Coffee Roasting Machine. While these machines are strictly made for roasting coffee, they use the same principles are purpose-built roasters, and many of them have built-in agitators which are perfect for ensuring consistent heating and roasting.
Frequently Asked Questions
You keep referring to light and dark roasts. What does this mean?
Light and dark roasts are the extents to which a raw coffee bean has been roasted. Light roasts are typically pulled out after the first crack and have a much sweeter and less bitter flavor and roast profile. Dark roasts are pulled out after the second crack and have a much more bitter flavor and roast profile. Lighter roasts tend to taste more like the original bean and can be fruity or even floral. Darker roasts, on the other hand, have more smokey, toasted flavors – these are the kinds of roasts used in strong, full-bodied coffees like espresso and French press.
What is the best roast?
This all depends on your tastes and proclivities. There’s no definitive best roast, it’s just all about what you enjoy.
Conclusion
So there we have it – the complete guide on how to roast coffee beans at home. We hope that we were able to demystify the process, and show that while it may seem slightly daunting, it’s not as difficult as it seems. So now there should be nothing stopping you from getting your hands on some raw beans, choosing a roasting method, and enjoying the freshest possible home-roast coffee on a daily basis.